Distributed authority general quickstart
Use this guide to learn how to create your first distributed authority Netcode for GameObjects project. It walks you through the connection setup, including connecting to the distributed authority service, and adding basic gameplay.
Distributed authority is still in beta. During the beta phase, using the distributed authority service provided by the Multiplayer Services package is free. When distributed authority is fully released, using the service will incur a cost.
Prerequisites
Before you begin, you need the following:
- An active Unity account with a valid license.
- The Unity Hub.
- A supported version of the Unity 6 Editor. Refer to the Netcode for GameObjects requirements.
Project setup
- Create a new Unity Project using the 3D template.
- Connect the project to Unity Cloud by selecting the Connect to Unity Cloud checkbox.
Install packages
- Install the latest
com.unity.netcode.gameobjectsNetcode for GameObjects v2.0.0 package. - Install the latest
com.unity.services.multiplayerMultiplayer Services SDK package.
Netcode for GameObjects setup
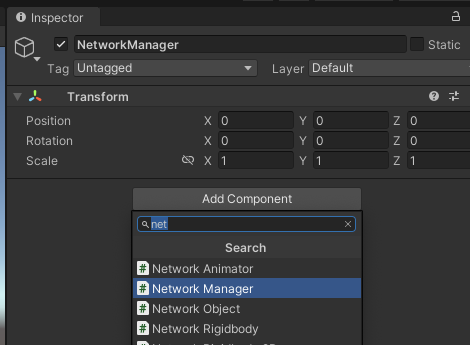
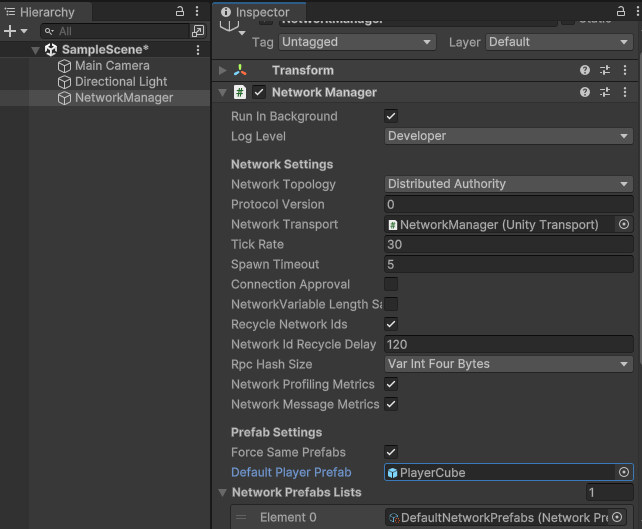
Using the SampleScene, add a new Empty object and name it NetworkManager.
Attach a Network Manager component to it.
Under the Network Settings, set the Network Topology property to Distributed Authority.
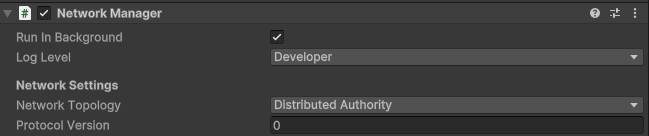
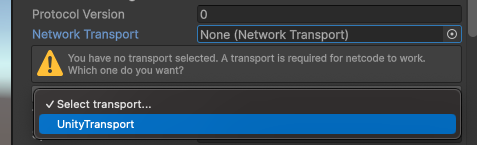
Under Network Transport, select UnityTransport from the list of options to add.
Save any changes to your objects and scene.
Connection setup
- Create a new script called ConnectionManager.cs. This script provides a user interface and the script logic required to connect to a distributed authority service session:
using System;
using System.Threading.Tasks;
using Unity.Netcode;
using Unity.Services.Authentication;
using Unity.Services.Core;
using Unity.Services.Multiplayer;
using UnityEngine;

public class ConnectionManager : MonoBehaviour
{
   private string _profileName;
   private string _sessionName;
   private int _maxPlayers = 10;
   private ConnectionState _state = ConnectionState.Disconnected;
   private ISession _session;
   private NetworkManager m_NetworkManager;

   private enum ConnectionState
   {
       Disconnected,
       Connecting,
       Connected,
   }

    private async void Awake()
    {
        m_NetworkManager = GetComponent<NetworkManager>();
        m_NetworkManager.OnClientConnectedCallback += OnClientConnectedCallback;
        m_NetworkManager.OnSessionOwnerPromoted += OnSessionOwnerPromoted;
        await UnityServices.InitializeAsync();
    }

    private void OnSessionOwnerPromoted(ulong sessionOwnerPromoted)
    {
        if (m_NetworkManager.LocalClient.IsSessionOwner)
        {
            Debug.Log($"Client-{m_NetworkManager.LocalClientId} is the session owner!");
        }
    }

    private void OnClientConnectedCallback(ulong clientId)
    {
        if (m_NetworkManager.LocalClientId == clientId)
        {
            Debug.Log($"Client-{clientId} is connected and can spawn {nameof(NetworkObject)}s.");
        }
    }

   private void OnGUI()
   {
       if (_state == ConnectionState.Connected)
           return;

       GUI.enabled = _state != ConnectionState.Connecting;

       using (new GUILayout.HorizontalScope(GUILayout.Width(250)))
       {
           GUILayout.Label("Profile Name", GUILayout.Width(100));
           _profileName = GUILayout.TextField(_profileName);
       }

       using (new GUILayout.HorizontalScope(GUILayout.Width(250)))
       {
           GUILayout.Label("Session Name", GUILayout.Width(100));
           _sessionName = GUILayout.TextField(_sessionName);
       }

       GUI.enabled = GUI.enabled && !string.IsNullOrEmpty(_profileName) && !string.IsNullOrEmpty(_sessionName);

       if (GUILayout.Button("Create or Join Session"))
       {
           CreateOrJoinSessionAsync();
       }
   }

   private void OnDestroy()
   {
       _session?.LeaveAsync();
   }

   private async Task CreateOrJoinSessionAsync()
   {
       _state = ConnectionState.Connecting;

       try
       {
           AuthenticationService.Instance.SwitchProfile(_profileName);
           await AuthenticationService.Instance.SignInAnonymouslyAsync();

            var options = new SessionOptions() {
                Name = _sessionName,
                MaxPlayers = _maxPlayers
            }.WithDistributedAuthorityNetwork();

            _session = await MultiplayerService.Instance.CreateOrJoinSessionAsync(_sessionName, options);

           _state = ConnectionState.Connected;
       }
       catch (Exception e)
       {
           _state = ConnectionState.Disconnected;
           Debug.LogException(e);
       }
   }
}
It's important to wait until OnClientConnectedCallback has been triggered before spawning objects. Spawning objects early will result in errors and unexpected behaviour.
- Add the
ConnectionManagercomponent script you created to the NetworkManager object.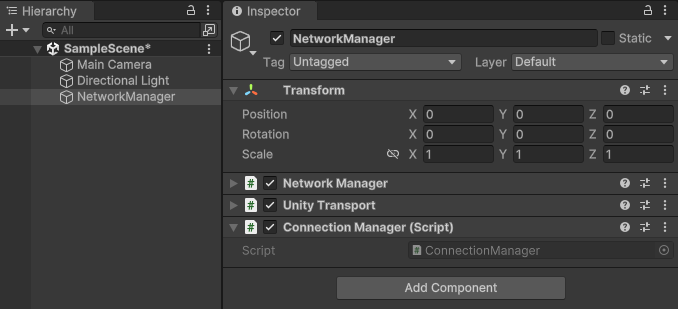
Adding gameplay
- Create a new Script called PlayerCubeController.cs:
using Unity.Netcode.Components;
using UnityEngine;
#if UNITY_EDITOR
using Unity.Netcode.Editor;
using UnityEditor;
/// <summary>
/// The custom editor for the <see cref="PlayerCubeController"/> component.
/// </summary>
[CustomEditor(typeof(PlayerCubeController), true)]
public class PlayerCubeControllerEditor : NetworkTransformEditor
{
    private SerializedProperty m_Speed;
    private SerializedProperty m_ApplyVerticalInputToZAxis;

    public override void OnEnable()
    {
        m_Speed = serializedObject.FindProperty(nameof(PlayerCubeController.Speed));
        m_ApplyVerticalInputToZAxis = serializedObject.FindProperty(nameof(PlayerCubeController.ApplyVerticalInputToZAxis));
        base.OnEnable();
    }

    private void DisplayPlayerCubeControllerProperties()
    {
        EditorGUILayout.PropertyField(m_Speed);
        EditorGUILayout.PropertyField(m_ApplyVerticalInputToZAxis);
    }

    public override void OnInspectorGUI()
    {
        var playerCubeController = target as PlayerCubeController;
        void SetExpanded(bool expanded) { playerCubeController.PlayerCubeControllerPropertiesVisible = expanded; };
        DrawFoldOutGroup<PlayerCubeController>(playerCubeController.GetType(), DisplayPlayerCubeControllerProperties, playerCubeController.PlayerCubeControllerPropertiesVisible, SetExpanded);
        base.OnInspectorGUI();
    }
}
#endif


public class PlayerCubeController : NetworkTransform
{
#if UNITY_EDITOR
    // These bool properties ensure that any expanded or collapsed property views
    // within the inspector view will be saved and restored the next time the
    // asset/prefab is viewed.
    public bool PlayerCubeControllerPropertiesVisible;
#endif
    public float Speed = 10;
    public bool ApplyVerticalInputToZAxis;
    private Vector3 m_Motion;

    private void Update()
    {
        // If not spawned or we don't have authority, then don't update
        if (!IsSpawned || !HasAuthority)
        {
            return;
        }

        // Handle acquiring and applying player input
        m_Motion = Vector3.zero;
        m_Motion.x = Input.GetAxis("Horizontal");

        // Determine whether the vertical input is applied to the Y or Z axis
        if (!ApplyVerticalInputToZAxis)
        {
            m_Motion.y = Input.GetAxis("Vertical");
        }
        else
        {
            m_Motion.z = Input.GetAxis("Vertical");
        }

        // If there is any player input magnitude, then apply that amount of
        // motion to the transform
        if (m_Motion.magnitude > 0)
        {
            transform.position += m_Motion * Speed * Time.deltaTime;
        }
    }
}
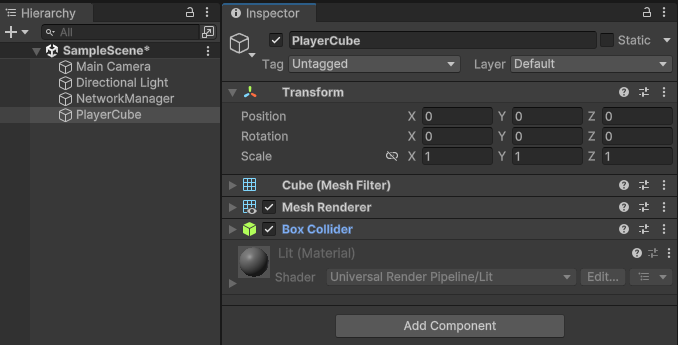
- In the open SampleScene, create a 3D cube and name it PlayerCube.
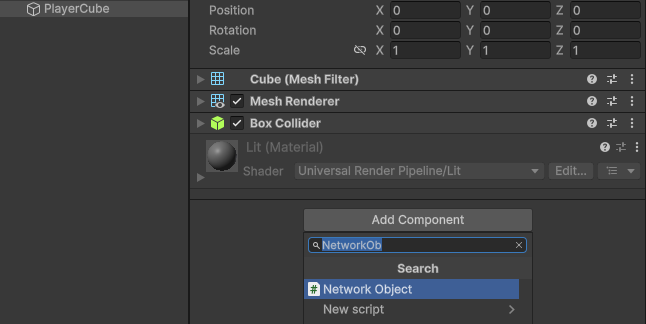
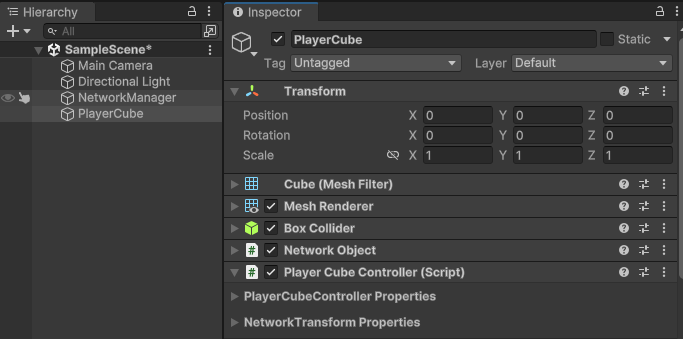
- Add a NetworkObject component to the PlayerCube.
- Set the NetworkObject Ownership to "None".
- Add the PlayerCubeController to the PlayerCube.
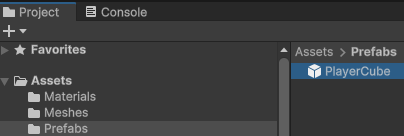
- Create a Prefabs folder in the root Assets folder.
- Drag and drop the PlayerCube object into the newly created Prefabs folder.
- Delete the PlayerCube object from your scene.
- Open the Network Manager, navigate to Prefab Settings, and set the Default Player Prefab to be the newly created PlayerCube.
- Save all changes to the scene.
Next steps
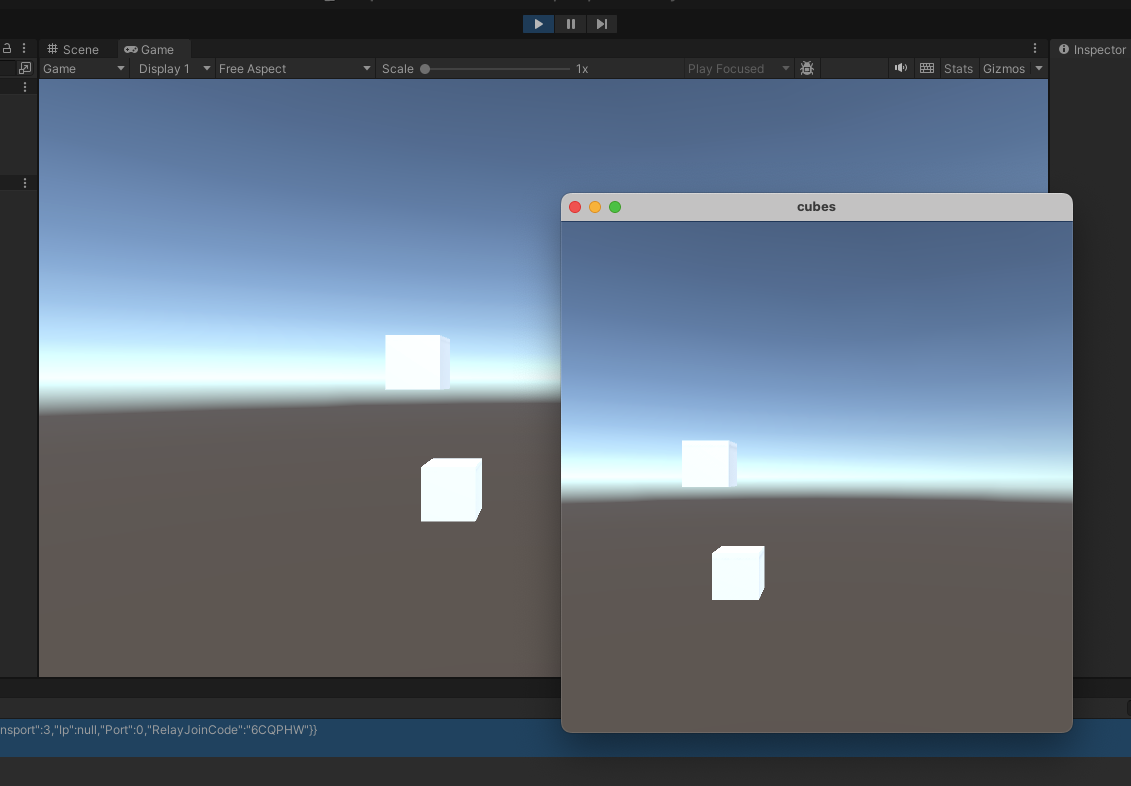
Hit play, fill out the Profile Name and Session Name, then click Create or Join Session. The profile name is the name of the player, so ensure this is different on every client. The session name is the identifier of the session you are joining, so this should be the same on every client. If everything has been set up correctly you will see the game create a session, connect to it, and spawn a PlayerCube.
If you create a build and connect a new profile to the same session you will see a second PlayerCube spawn and sync up with the first.